PLATE Mic 6 REC.
Available Formats: Plates

Only MIC6 is molded to a thickness close to net with a stress relieved granular structure to virtually eliminate distortion caused by use and fluctuations in end-use temperature.
The manufacture of MIC6, the most advanced process in the foundry plate industry, promotes consistency between the plates and reduces the risk of altering the stability of the material by trapped stress. In addition, the optimal cleaning of molten metal has been achieved through the continuous application of SNIF impurity and degassing technology to each MIC6 plate that is molded.
The unique combination of the MIC6 product features allows for further processing with precise control of tolerances and dimensionality.
Fully relieved of stress, the MIC6 is a free-cut aluminum alloy with excellent machining characteristics, producing small, uniform chips in a variety of high-speed operations.
When critical applications demand superior performance, plates that claim to be "good enough" simply are not. MIC6 customers can perform extensive machining routines that involve extensive metal removal with a minimal risk of distortion, which often exceeds the product accuracy requirements of the most demanding end uses.
TYPICAL PROPERTIES
Tensile strength: Typical 24 ksi / 166 MPa
Breaking strength: Typical 15 ksi / 105 MPa
Elongation: 3%
Brinell hardness: 65
Coefficient of Thermal Expansion (average)
68 to 212 ° F (20 to 100 ° C): 13.1 x 10⁻⁶ in / in · ° F | 23.6 x 10⁻⁶ m / m · K
68 to 392 ° F (20 to 200 ° C): 13.6 x 10⁻⁶ in / in · ° F | 24.5 x 10⁻⁶ m / m · K
Thermal conductivity: 0.34 cal / cm · s · ° C | 142 W / m · K | 82 Btu / ft · h · ° F
Electrical Conductivity, IACS: 36%
Elastic module:10.3 x 10⁶ psi / 71,000 MPa

SIZES
Standard Thicknesses: 1/4 ″ - 4 ″ | 6? 100 mm
Standard Widths: 48.5 ″ & 60.5 ″ | 1232 & 1537 mm
Standard Lengths: 96.5 ″, 120.5 ″ & 144.5 ″ | 2451, 3061 & 3670 mm
Non-standard thicknesses, widths and lengths may be available upon request.
TOLERANCES
Surface: Each side is machined to a maximum of 20 micro inches or 0.50 microns of smoothness.
Edge Condition:
Width: milling or saw cutting
Length: saw cut
Mill Plate:
Length tolerance: +1/2 ″ -0. / + 13mm -0.
Width tolerance: +1/4 ″ -0. / + 7mm -0.
Maximum plane deviation:
Specified plate thickness maximum variation:
3/4 ″ and more: .005 ″ / 19mm and more: .127mm
1/4 ″ to 5/8 ″: .015 ″ / 6mm and more: .381mm
Flatness tolerances in the mill are measured using a laser system and / or a granite flatness table.
The tolerances apply both to the standard plate of origin and to the blank spaces cut when using the appropriate cutting techniques and equipment, and to the measurements obtained in a flatness table when using a straight edge with a maximum length of eight feet (2.45 m).
When parts must work every time, demand no less than MIC6 for these critical applications:
- Casting patterns
- Heating and cooling plates.
- Medical instrumentation: internal functional components.
- Packaging machinery and molds
- Pharmaceutical machinery
- Plastic component manufacturing: temperature control manifolds
- Printing machinery
- Robotics
- Vacuum cameras for computer chips
- Vacuum chucks
- Aircraft tools
- Automotive tools
- Motherboards, side plates and index tables
- CNC routing tables
- Checking accessories, meters and templates
- Chip printers
- Circuit printers
- Dielectrics
- Document Classification Team
- electronics
- Food machinery: side frames and functional components.
Mic6® MACHINING
General recommendations
-
- Use machines capable of operating at high speeds with minimal vibration or kickback.
- Use high speeds and advances for sharp cuts, high speeds with lower advances for better finishing cuts.
- Use the following cutting fluids to prevent aluminum from adhering to tool surfaces and to remove heat:
- Water soluble oils for most machining routines.
- Cutting oil with additives for horizontal milling, turning and tapping requirements. Commercial wax bars and paraffin have been used for some special sawing operations and others.
- The water used with the recommended refrigerants must be pH neutral, with minimal chlorides. The refrigerant must be cleaned from the plate when the machining is finished, do not leave the refrigerant on the plate for prolonged periods or overnight.
- Use sharp tools with larger or positive rake angles. The surfaces of the tool must be smooth and without marks or scratches. Allow ample space.
Horizontal milling
If the appropriate cutting tools are used, this method can be performed efficiently with grooves, astride milling, edges and a single tooth. The climbing cut provides a smoother finish with better tolerance control as long as the recoil is minimal. Use high peripheral speeds to reduce any tendency to rubber and load formation.
Vertical milling
When large surfaces are to be milled, this method is preferred due to greater chip separation and accessibility to the workpiece. Front and fly liners are used for the surface, while end and shell mills are used to contour and create cavities. The cutting angles of the fly for top and side tools are similar to those used in turning. Face, circular, spiral and helical cutters must have undercut teeth to provide an essential top rake.
Shaped and brushed
This method produces a rough torn surface due to the low speed in the travel of the tool on the workpiece. A fair finish can be achieved with an extreme angle of inclination to give a sufficient cutting action to the edge of the tool.
Circular saws
Peripheral blade speeds of approximately 15,000 feet per inute (4575 m / min) are recommended. The blades must have carbide teeth with an inclination angle of up to 45 degrees. These blades are usually manufactured with chip-breaker teeth or with alternate rake teeth: one tooth cuts one side and the next one cuts the other.
Band cut
High speed saws with a blade speed of 3,000 to 6,000 feet per minute (915 to 1830 m / min) are recommended. They should be made of tempered steel with a minimum top rake of 15 degrees and 4 to 8 teeth per inch (6 to 3 mm per tooth). Proper support for the plate being cut is mandatory and will help maintain flatness tolerances during cutting.
Drilling
The recommended holes for the cast iron plate should have more turns per inch than the common holes. The flutes of these drills must be very polished. Cutting compound should be used.
Turning
Lathes capable of turning the cylinder head at 5,000 to 9,000 feet per minute (1525 to 2745 m / min) should be used. Use carbide tipped tools with a
Top rake of 40 degrees and a side rake angle of 18 degrees. The feed must not exceed .020 inches (0.5 mm) per revolution.
Playing
Manual or mechanical taps will produce smooth and precise threads on the MIC6 cast plate. For a complete thread, the drill must be of a diameter slightly smaller than that used for steel. Rounded or trapezoidal threads are recommended: the thread length should be 20% longer than for steel. The inserts will prolong the life of the thread.
Surface exposure
Machined MIC6 parts have been successfully performed for decades of service without evidence of corrosion or abnormal surface oxidation. The exterior and other environments that are high in humidity tend to induce the development of surface spots. Marine exposures should be avoided.
Cycles thermal
The MIC6 can perform a repetitive cycle through thermal exposure without affecting or altering the physical properties of the plate. The heat treatments during each cycle can vary from 250 to 600 ° F (120 to 315 ° C). Full support under the plate is recommended during the thermal cycle: the thinner the plate, the more important this consideration will be.

WORKING WITH Mic6®
Anodized
The MIC6 has been successfully anodized for thousands of end uses, providing good performance and a uniform coating depth over the entire surface with hard or conventional layer anodizing treatments. Both are applied after the machining routine to improve corrosion protection, wear resistance and / or as color enhancement.
An unrecorded type cleaner is recommended. Strong caustic-based or aggressive cleaners that burn tend to attack the molten grain structure and, therefore, excessively harden the surface. With a cleaner that does not etch, the smooth machined surface is best maintained for subsequent anodizing.
A darker and more natural gray color is produced as a result of anodization. Since MIC6 is a casting, variations in the tone and texture of the gray appearance can occur within a given plate or from plate to plate. However, when typical applications involve only one piece of MIC6, any piece-to-piece variation is no cause for concern.
When a black dye treatment has been used, the color developed has been an intense black tone, which satisfies the requirements of most end users. This color tone has proven consistent from piece to piece and from batch to batch. For conventional anodization, a solution of sulfuric acid at 15% by weight, a current density of 12 amps per square foot (1.2 A / dm2) and a bath temperature of 70 to 90 ° F (20 to 32 ° C) are suggested. ).
Once the anodization is complete, the surfaces should be rinsed: when organic dyes are used, good rinsing practices become critical. If all sulfuric acid in the anodizing bath is not rinsed before dye treatment, white spots may appear. Although these cases are rare, a neutralizing solution of 5% ammonium oxalate or sodium bicarbonate applied for 5 to 10 minutes has proven effective in its elimination. If the sulfuric acid in the anodizing bath is trapped in any vacuum, it may bleed after the dye treatment and oxidize the dye, causing a lighter stain.
For hard coat anodizing, a variety of patented processes are used. In general, bath operating temperatures are 32 to 50 ° F (0 to 10 ° C) and current densities are 20 to 36 amps per square foot (2.0 to 3.6 A / dm2). The combination of lower bath temperature and higher current density produces a thicker coating that has better wear resistance.
Excessive operating temperatures should be avoided when performing these hard coat anodizing treatments, as they may affect quality and thickness.
of the lining. It is suggested that a test piece be evaluated when a given hard coating process is considered.
Welding
MIC6 components can be successfully welded using metal arc welding processes with fusion gas (GMAW or Mig), gas tungsten arc welding (GTAW or Tig) and state friction welding processes (FSW) solid. GMAW is used more frequently and GTAW has some limited applications. Argon, helium or a mixture of the two are the only protective gases recommended for welding MIC6.
Because the MIC6 has a high thermal conductivity, it is recommended to weld "hot and fast", which means that the welding current must be set at a level that provides adequate heat input while maintaining a moderate welding speed . Specific parameters can be found in welding manuals such as? Aluminum welding - Theory and practice ??? from The Aluminum Association.
Aluminum fill alloys 4043, 4145 and 5356 are all acceptable for use when welding MIC6. Filler alloy 4145 (10% Si, 4% Cu) offers the best welding capacity and the absence of cracking with 4043 (5% Si) as a good second option; both would be recommended if the service temperature of the welded assembly is greater than 150 ° F (66 ° C). Under some conditions (for example, high part restriction), filler alloy 5356 may cause some cracking in the melting zone and heat-affected zone (BEAM) of MIC6 parts. In addition, welds deposited with this filler alloy can be sensitized to stress cracking under high temperature stress and should only be used in service applications below 150 ° F (66 ° C).
When testing with transverse tension to the welds, welds of 0.5 in. Thick, produced with the 4145 and 5356 filler cables, they are generally broken in the HAZ with joint efficiencies that can reach 96%. In general, it is recommended to weld the MIC6 at intermediate temperatures not exceeding 150 ° F (66 ° C). If preheating is required, the temperature should be limited to 250 ° F (120 ° C).
Pre-welding cleaning and rust removal are important for the successful welding of MIC6. Lubricants and residual machining moisture will produce porosity in the welds.
Before welding, clean and solvent dry the areas to be welded from surface contaminants. The natural oxide of aluminum melts at 3700 ° F (2035 ° C), while aluminum melts at approximately 1200 ° F (650 ° C).
This oxide can act as a barrier to the proper fusion between the weld and the base metal. Usually, light brushing with a clean stainless steel brush, after the surface has been contaminated, will remove the oxide film. For applications where fillet welds are used, it is not necessary to prepare the edge of the weld joint. For butt joint applications, the preparation of the weld seam edge is required, such as a single or double V bevel (depending on the thickness to be welded).
As with all welded assemblies, it is strongly recommended that the welding procedure used be tested and qualified on the joint model (s) before introduction and use in service.
Painting
MIC6 can be painted or powder. Plate surfaces must be cleaned to remove any lubricant or residual machining oil; Both water-based cleaners and solvents have proven effective. Once cleaned, there are several different approaches to greater surface preparation.
A chemical conversion coating in combination with a primer layer has been shown to provide the best surface protection and abrasion resistance.
In some applications, the primer layers have been applied directly to the surface of the plate; in other cases, even the primer layer has been omitted. Light anodizing on a limited basis has also been used for surface preparation before a coating application.
A moisture free surface is the key to success with any coating method. Unless the surface is dry, moisture trapped by the micro
Shrinkage could contribute to failures in the final coating.
Formats
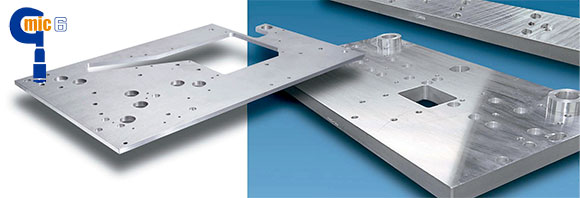
MIC6® precision machined cast aluminum plate.

